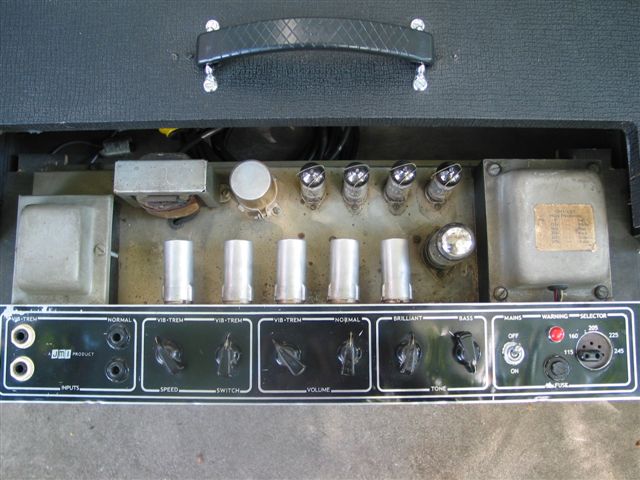
Vox AC30 control panels
1960 - 1968

Detail from the promotional booklet for the AC30 produced by JMI in late 1960 / early 1961
The material on this page - for the most part a series of notes - falls naturally into two parts: first, appearance and design; second, matters relating to production - the processes employed (particularly anodisation) by the specialist panel makers contracted by JMI to make the panels, notably "The British Engraving & Nameplate Manufacturing Company" in London, which was from the late 1940s at 32, Tottenham Street, W1. The company had worked for the R.A.F. during the war. The grey panels produced from 1964 are not unlike RAF blue/grey.
Batches of panels were occasionally run up locally in Dartford, however (two examples towards the end of this page). New designs were also tried out from time to time on production amps. See for instance, the AC15 panel pictured at the foot of the page. The section on manufacturing, which will probably emerge as a second page rather than an expansion of this one, is currently in preparation.
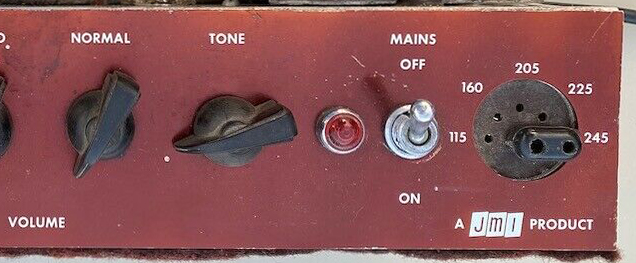
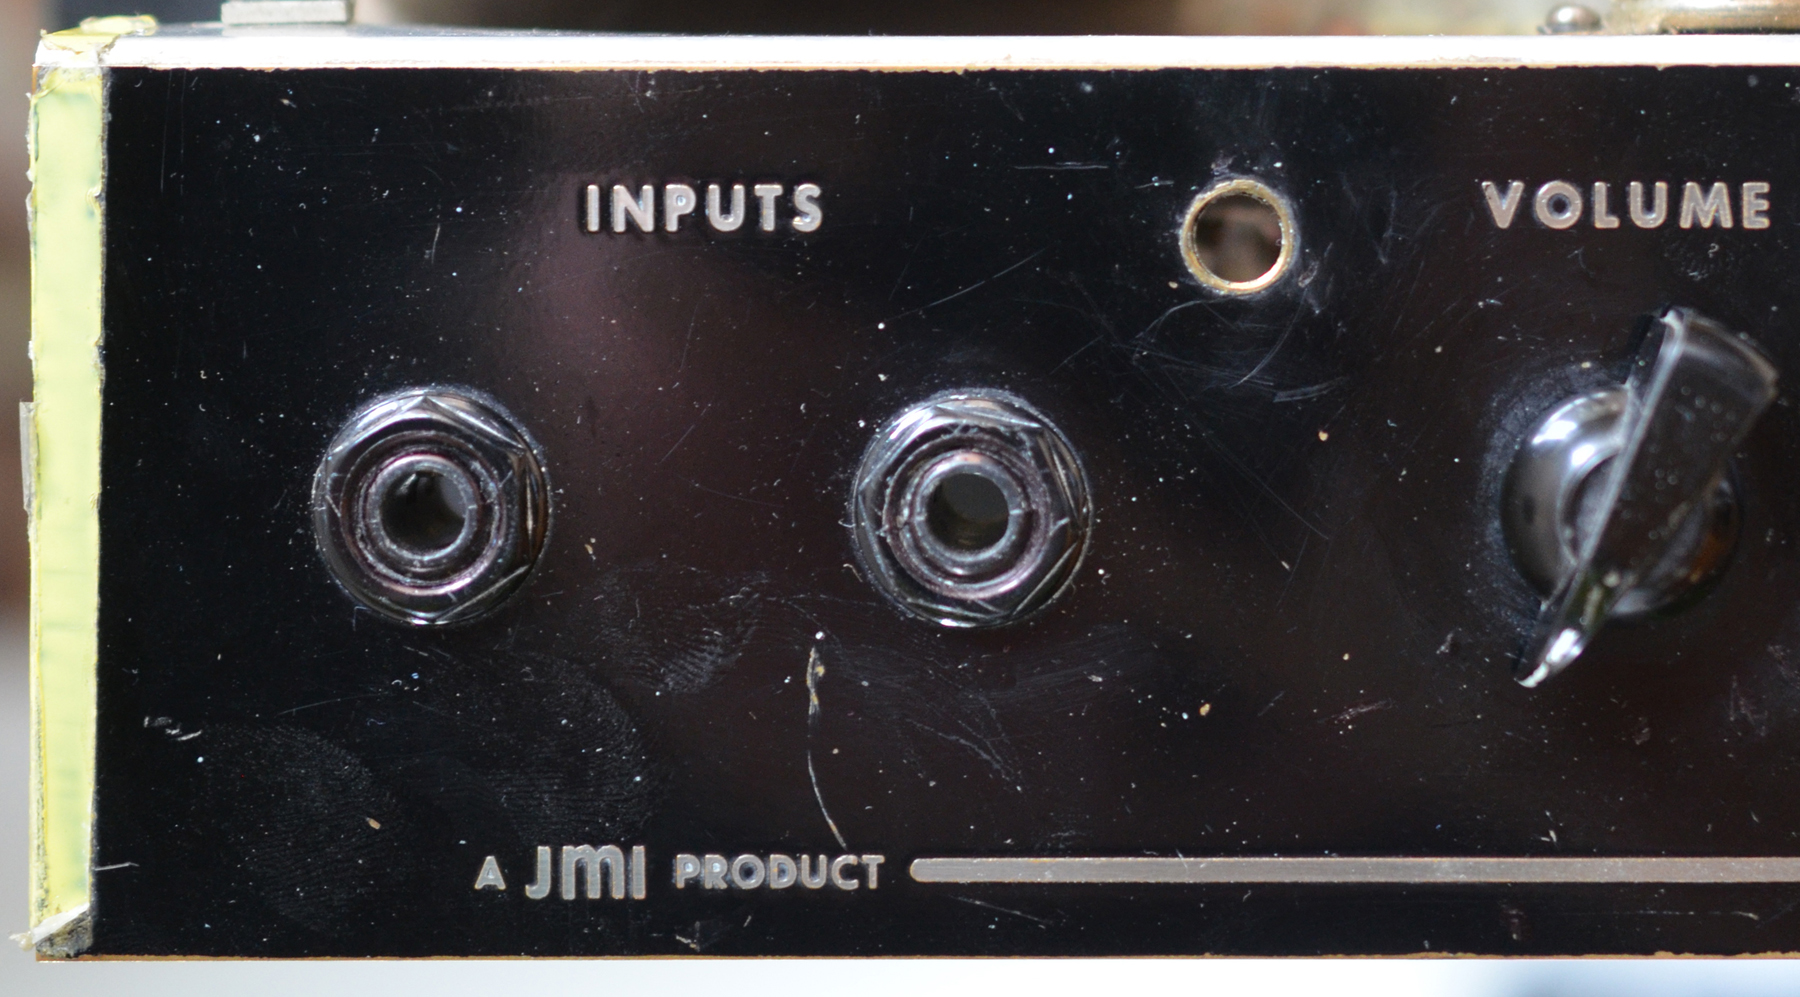
Black and copper panels
First standardised font
From c. 1960 through to early 1963, the legends of most AC15, AC30/4, AC30/6 panels, and some T60, were laid out in the same font and with similar bounding lines dividing panels into "sections". AC10s are in many ways a case apart. Below, for comparison, details of "standard" AC15 and AC30/6 black panels, and an early copper panel (from early 1962). Note the flat-headed "3" and the "1" with pronounced downward tick. The "JMI" blocks look to be the same too, though the letters on the black panels appear to be slightly fatter. The differences in the spacing of letters and so on is simply a result of the fact that layouts were done by hand.
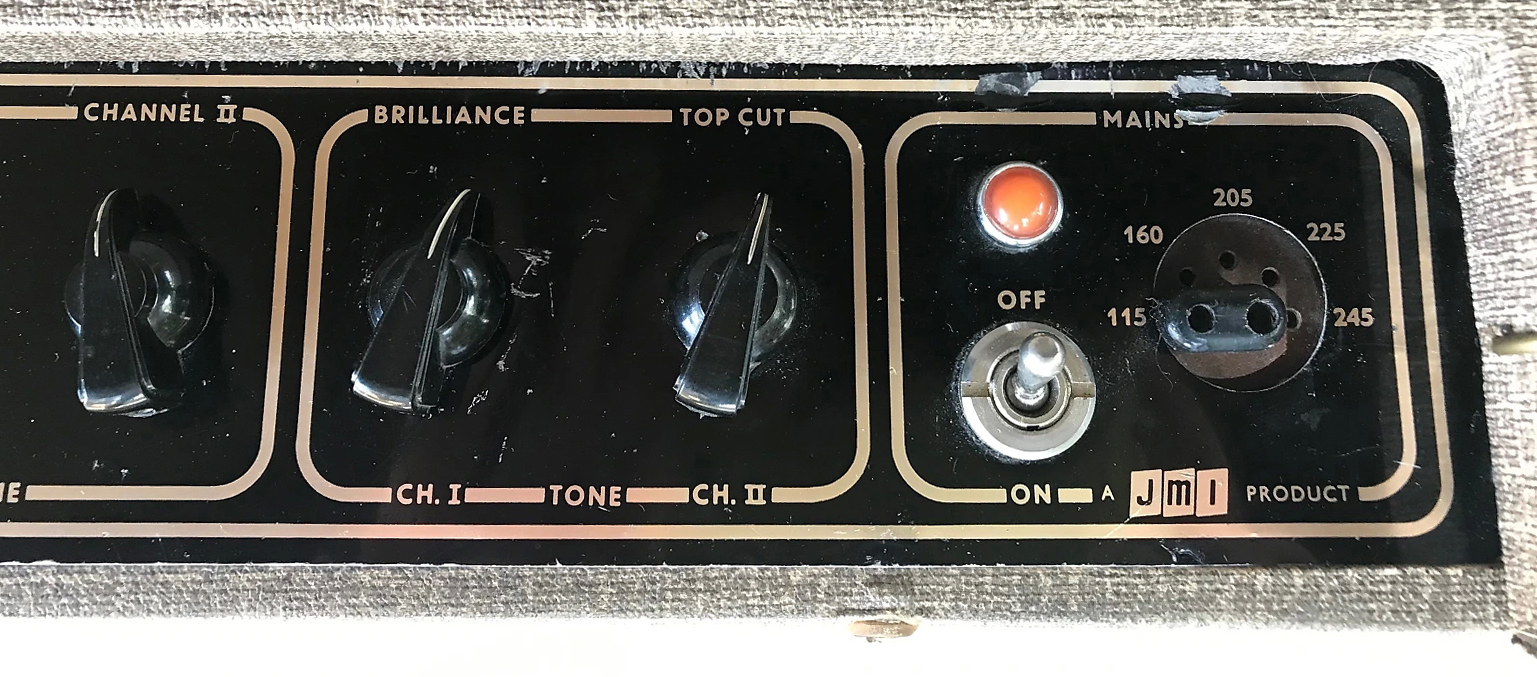
Single speaker AC15 of c. 1960 / 1961.

AC30/6 serial number unknown, early 1961.
AC30/6 serial number 5002, early 1962.
Black panel T60 serial number unknown, early 1963. Same font (letters and numbers) as above, spaced more widely; "JMI" logo compressed vertically to fit.
Details from the AC30 panels above, approximately to scale. The letters on the black panel are slightly more dispersed:


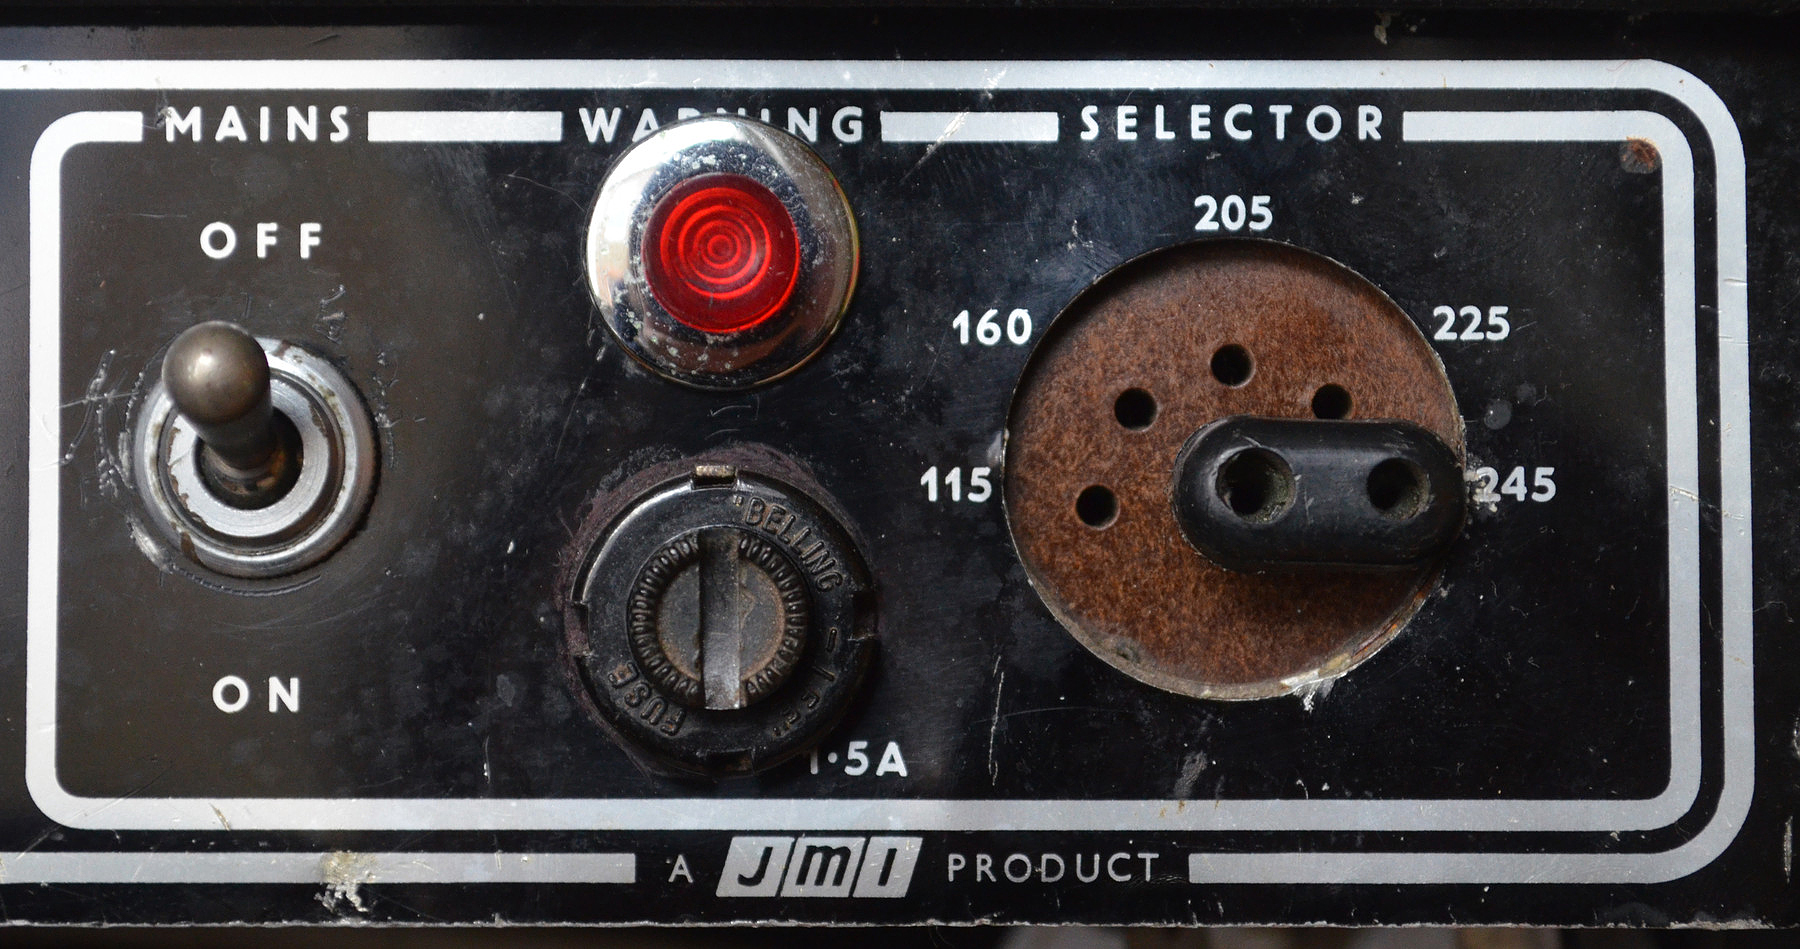
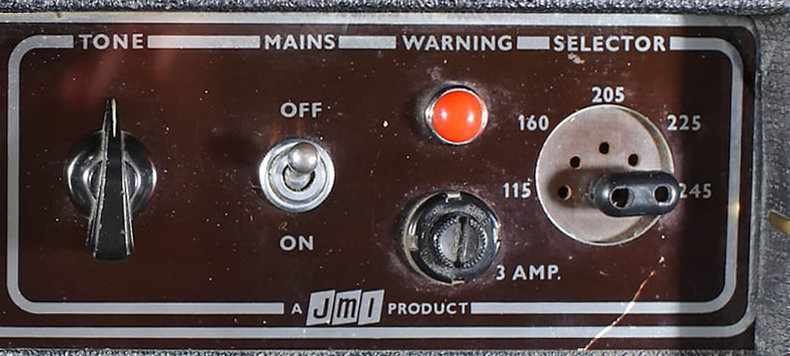
1963-1964: new font
In 1963 the design changes. From some point in the low 6000s (where AC30 serial numbers are concerned), the legends are given in taller, thinner type; "PRODUCT" lies closer to the silver bounding line; "JMI" is heavier; "3" has a rounded top; and "1" no longer has the pronounced downward tick of the older font. At present the earliest AC30 with one of these revised panels appears to be serial number 6038.
Serial number 5002 - earliest type.
Serial number 6822 - second type.

AC30 panels with integrated Top Boost. Note the form of the "3" and "1". In these panels, which are laid out differently to accommodate the two extra controls (treble and bass), "3 A" takes the place of "3 AMP".
AC10 serial number unknown. This is transitional in terms of typography - old style "JMI" logo but new style lettering. Certain copper panel AC10s have level markings around the volume and tone controls (the only numbers supplied being "0" and "9") along the lines of T60 control panels.
1963-1964: a second new font
At much the same time as the font pictured above comes in, another makes its appearance, laid out a little differently. The gap between the JMI logo and "PRODUCT" has been reduced. Letters and numbers are generally spaced further apart. "3" is thinner; and "1" has a better defined tick. As far as the logo is concerned, the three silver parallelograms on which "JMI" sits are narrower and a little more angular.
AC30/6 serial number 6822.
Serial number in the low 7000s (?).
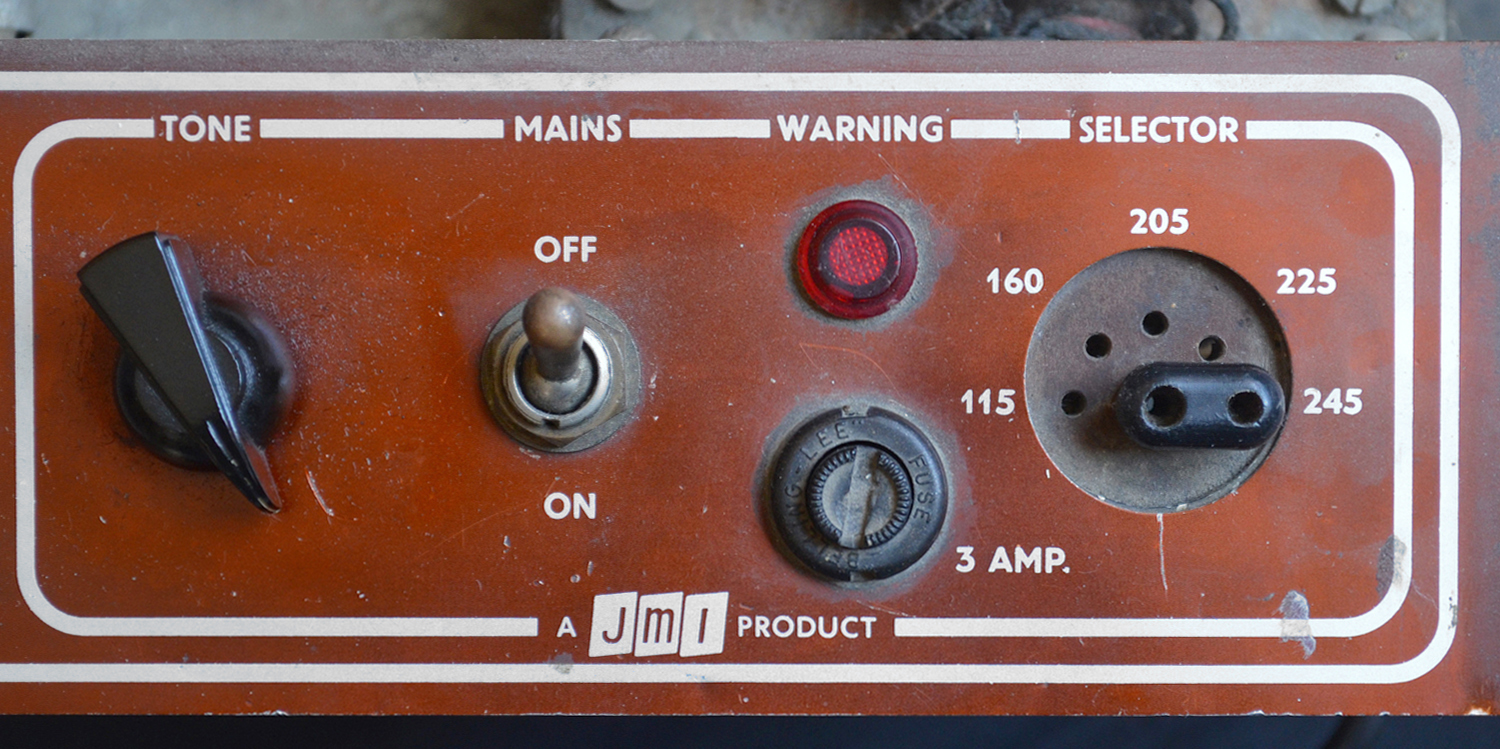
AC30/6 serial number 13556, early to mid 1964. Dyes would occasionally come out in different colours on the anodised aluminium - burgundy above. There are also examples of panels in dark orange, and a sort of dull crimson.
The anodisation process: black and copper panels
Black panels were double anodised; copper panels, single. In the case of the former, the second anodisation added the gold colour to lines and legends.
In the days before Letraset (1960-1961), captions, logos, lines, and so on, would be printed up on paper, actual size, by a printer, and the layout would be created by careful cutting and pasting.
Layouts included positions and centres of the holes needed for input jacks, potentiometers, etc, such that the panel, once anodised, could be machine drilled accurately.
With the advent of Letraset in 1960-1961, layouts will have become much easier. Letraset not only provided letters and numbers, but lines, curves, circles, and so. The principal font used by JMI was Futura Bold.
(1) Once the layout had been finalised and checked, the first stage in the process was the making of a sharp (and clean) photographic negative transparency.
(2) The specialist panel maker might either prepare panels individually, or laid out as multiples on a single large sheet, to be guillotined at a later stage in the process.
(3) The surface of the aluminium was coated with a layer of photo-sensitive emulsion, and a light source directed through the photographic negative onto it. Areas exposed to light - i.e. the captions, lines and so on - became insoluble in water/developer; the other areas (ie. the majority of the panel) soluble. The emulsion that remained was also resistant to the acid used in the anodisation process.
(4) The aluminium was then immersed in the anodising bath - an electro-chemical (electrolytic) dip, direct current passing through a solution of sulphuric acid. The process made exposed areas of the metal - those not protected by the emulsion - porous to dye. Elements of the design were protected by the acid-resistant emulsion.
(5) Panels were washed in distilled water, then immersed in or sprayed with the dye. They were washed again with distilled water and then boiled for around 15 minutes to seal the colour.
(6) The emulsion protecting the design was removed at this point, leaving legends, lines, and positioning marks in bare, un-dyed, aluminium.
(7) Black panels would be anodised a second time to add gold colour to the bare aluminium of the legends.
(8) If larger sheets had been anodised, individual panels were cut out. Holes for the input jacks, potentiometers, and other hardware, were then machine drilled, thereby removing the marks provided for centring.
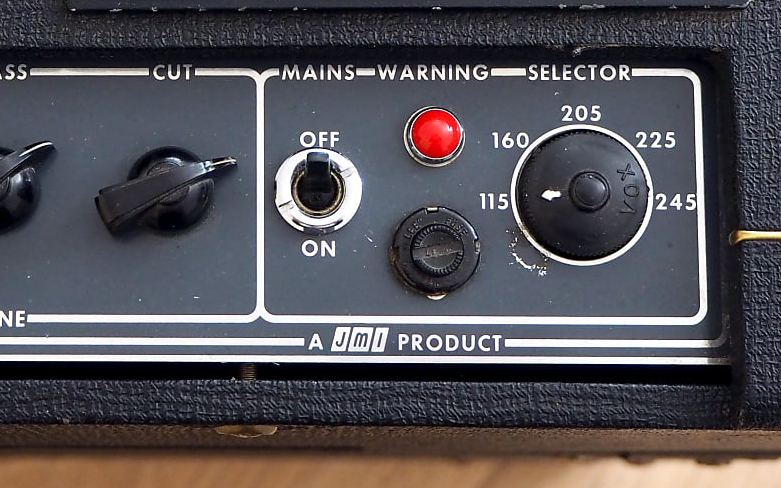
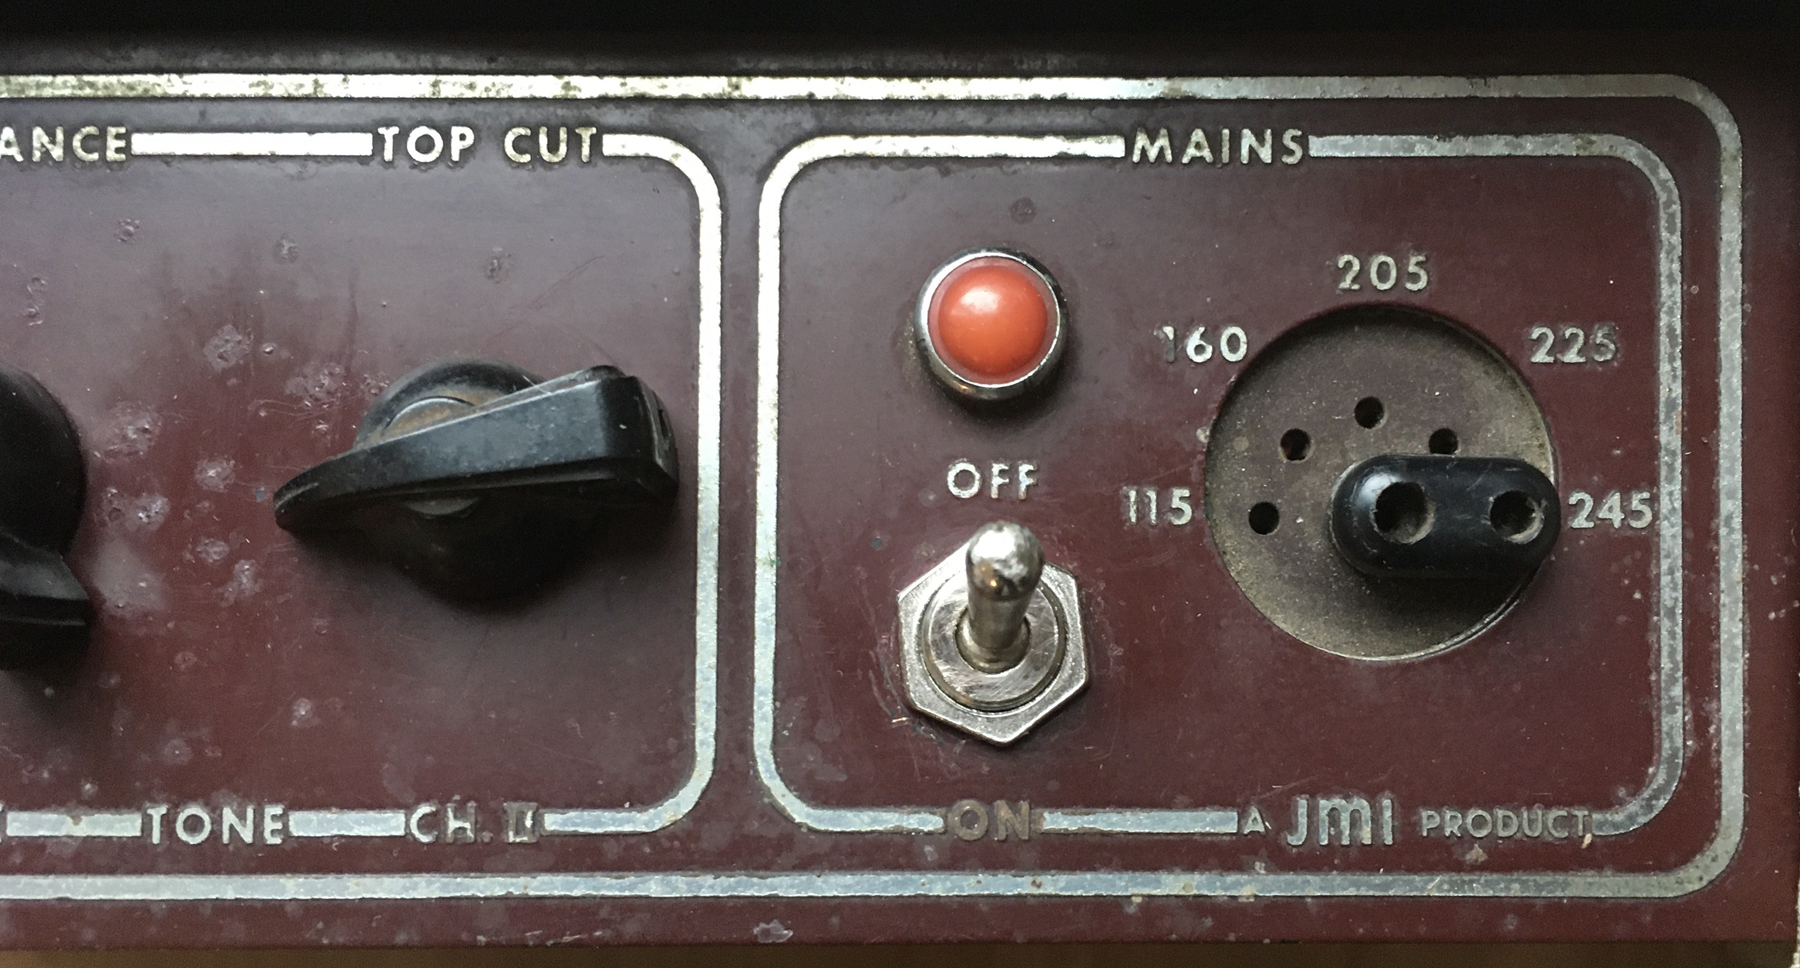
Grey panels
1964-1967
Grey panels were made by a different process - "etch and fill". An account of the process, which was more expensive than anodisation, will be given in a separate section. Although details in the design and layout of grey panels remained fairly consistent from 1964-1967, there may have been at least one variant early on:
The panel on an early grey panel AC30T. Notice the smallness of the "JMI" logo on the large plain metal background, and the lack of "MAINS", "WARNING" and "SELECTOR". Possibly a repro? It looks to have been made by an anodising process rather than etch and fill. No other example has yet come to light.
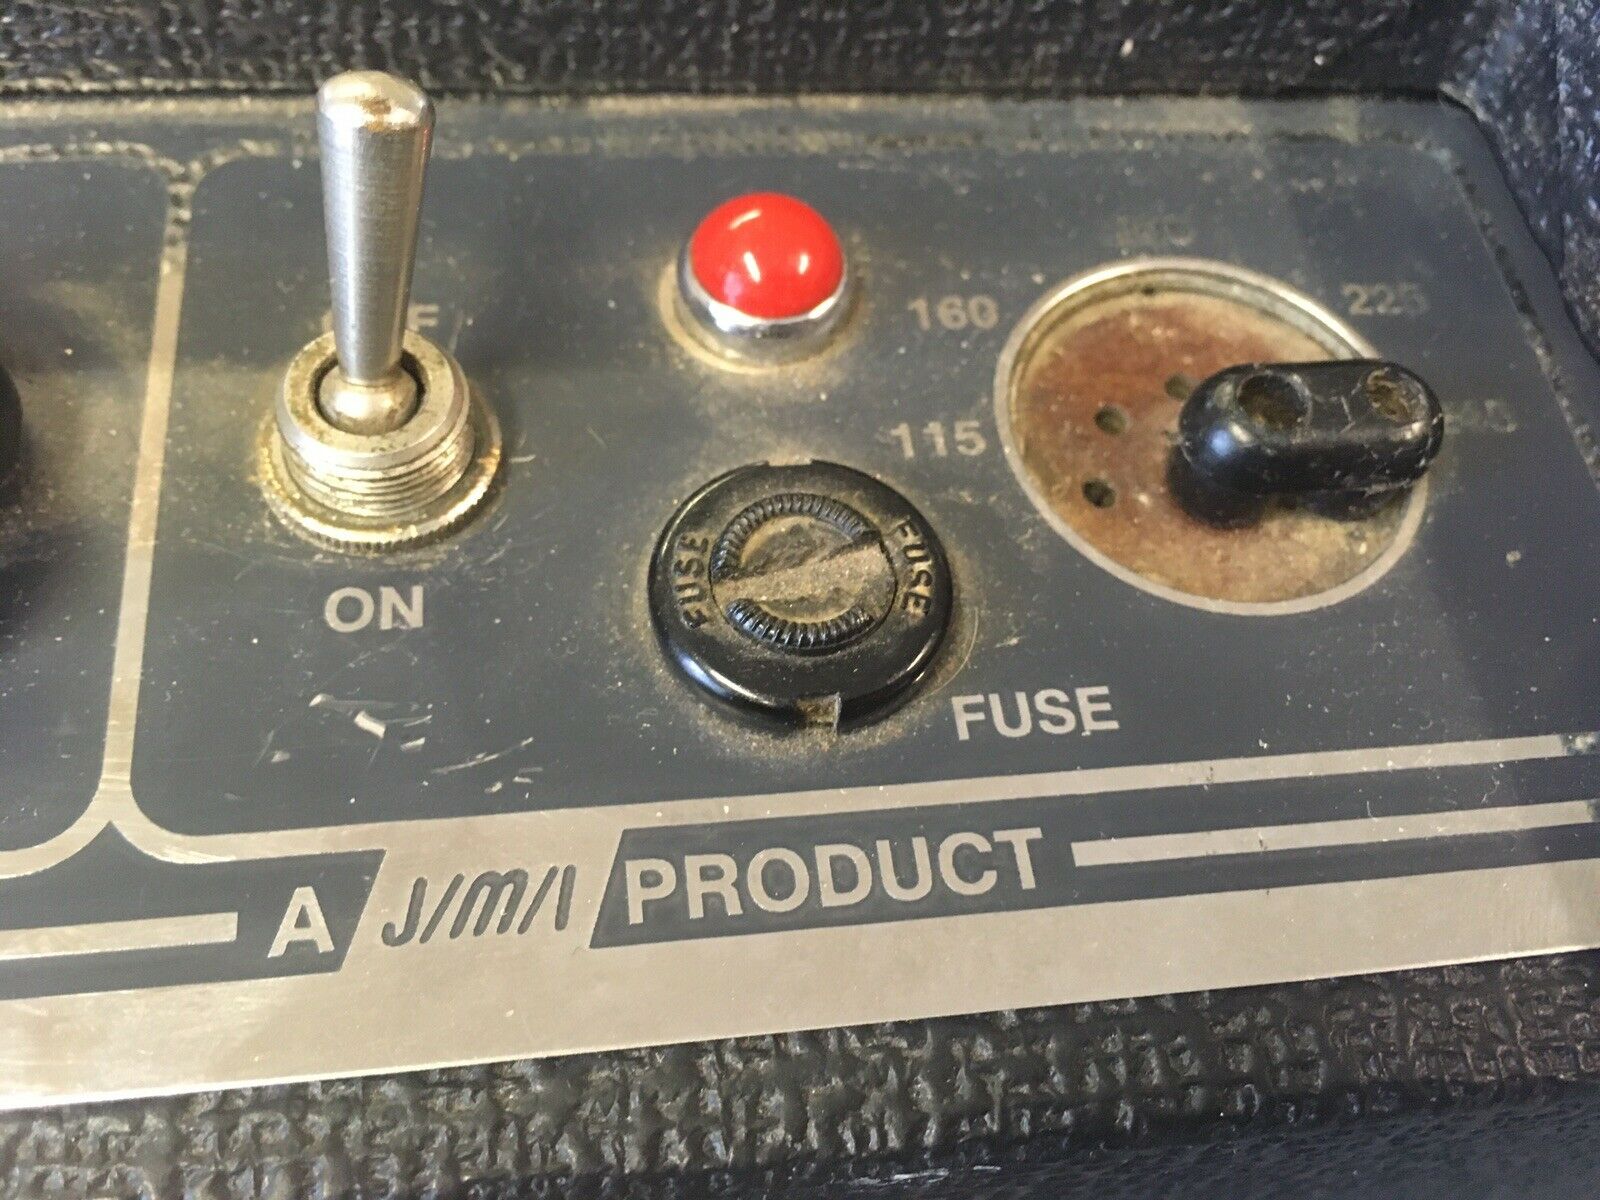
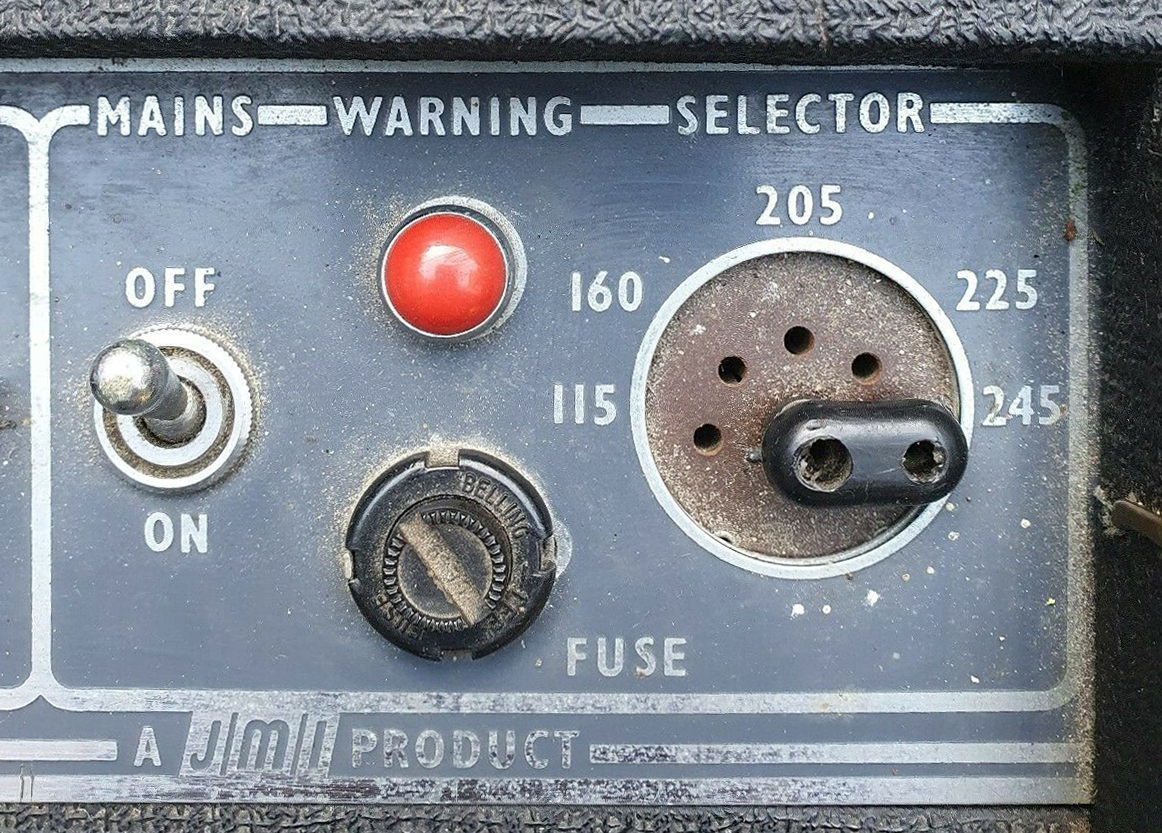
Below, a detail of the format normally employed for grey panel AC30s - those with top boost (treble and bass) controls in-panel, and those without. The letters are slightly more compressed than those used on the copper panels - note the "A" for instance. The numbers are plain, without serifs, and relatively tall. Silver lines run along the width of the panel top and bottom. The parallelograms behind the letters of the "JMI" logo merge with the line on the lower edge and the inner bounding line of the section above it. "FUSE" is now the legend beside the fuse-holder.
Super Twin serial number 2739, an AC30TB (top boost integrated in panel), mid to late 1964. The standard form of the JMI logo on grey panel amps.
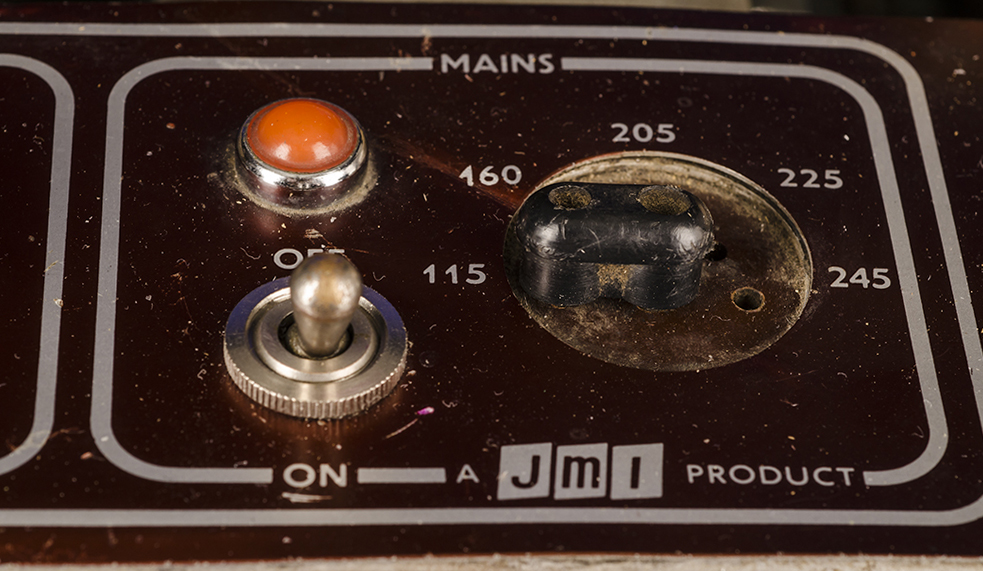
1967-1968
In 1967, JMI returned to the older style of anodised panel. General layout took its cue from previous grey panels; but other elements of the design have more in common with the copper panels of 1964. Lettering is thicker and less tall. Numbers have serifs; and the "JMI" logo is on three discrete parallelograms which have no contact with the bounding lines. No legend for the fuse was provided.
Super Twin serial number 5438, an AC30TB, c. 1967.
Grey panels - the etch-and-fill manufacturing process
Preparation of the layout (design) was much the same as for anodised panels. The positions and centres of the holes needed for input jacks, potentiometers, etc, would be marked, as before, so the panel could be machine drilled accurately later on.
Once the layout had been finalised and checked, the first stage in the process was the making of a sharp (and clean) photographic negative transparency.
Large sheets of aluminium were coated with a layer of brass. The sheets will have been guillotined into panel-sized units later.
The brass upper layer was coated with a photo-sensitive emulsion, and a light sources directed through the negative onto it. Areas exposed to light - i.e. the captions, lines and so on - became resistant to acid; the other areas (ie. the majority of the panel) remained unprotected. The panel was washed in a solution that only removed the emulsion that had not been exposed to light.
Acid was then applied to etch away the areas of exposed brass. The legends and elements of design (still protected by emulsion) were left in high relief.
Epoxy enamel blue/grey colour was then sprayed onto the panel, filling up the sunken portions almost but not quite level with the surface of the legends.
Once the blue/grey colour had hardened and dried, silver colour was rollered across the panel's surface, touching only the raised letters, lines and so on.
The panel was then cleaned and checked. Holes for the input jacks, potentiometers, and other hardware, were machine drilled, removing the marks provided for centring.
Panels made in-house and locally in Dartford
1960-1964
As mentioned at the head of this page, specialist panel makers made the majority of panels for JMI. A few, however, were produced in-house. They were of two principal types - (1) try-out panels (engraved traffolyte); (2) silk-screened and painted panels used on small numbers of amps produced for sale.
A black panel AC30/4. One can see top left the flaking away of the paint to reveal the bare aluminium underneath. Thanks to Glen for the picture.

A black panel AC30/6. Note the flaking of the paint. Thanks to Glen again for the picture.
Non-standard panels (manufactured by contractors)
1960-1964
Where AC30s are concerned, the first panel illustrated in the section above on grey panels is certainly non-standard. Although it is difficult to make definitive statements at present, it may well be a try-out, or early design.
For the AC15 we are on firmer ground. An example of an "etch-and-fill" copper panel from mid 1962 has recently come to light. AC15 copper panels normally have a block "JMI" logo, as immediately below:
AC15 Twin from 1962. Anodised copper panel. Block "JMI" logo, and font of the first standardised type, the "1" with pronounced downward tick.
The non-standard panel has raised legends (a consequence of the "etch and fill" manufacturing process); a type of copper-coloured acrylic infill; and a "JMI" logo that otherwise first occurs on grey panel AC50s (autumn 1964) and black panel AC80/100s (late 1964).
AC15 Twin, mid 1962 (pots with March 1962 codes). Thanks to Marc for pictures of the amp. The "JMI" is simply letters, no background
AC80/100 serial number 241. Black panel produced by the "etch and fill" process. Note the form of "JMI" logo and the brass layer revealed by the hole drilled later. Some of the letters are slightly clogged with the silver-coloured finish used for the legends.